# How to use TCX
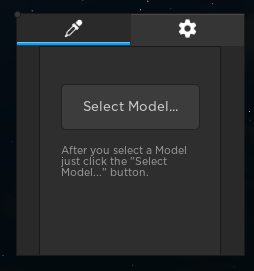
## Model Select Page
Upon launching the application, your initial encounter will be with the model selection page. To proceed, simply choose a model and click the "Select Model" button, which will move you to the Configuration page.
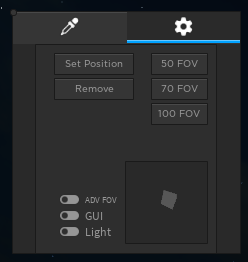
## Configuration Page
Once you arrive at the Configuration screen, you'll find several options to enhance your experience. To adjust the camera position, just click the "Set Position" button. When you're ready to stop using the plugin, simply press the "Remove" button. In the top right corner, you can change the Field of View (FOV), or you can set a custom FOV using the "ADV FOV" option located in the bottom left corner. If your model has a "PrimaryPart", clicking the "Light" option will illuminate it. Another option is the "GUI" button that opens a square GUI, allowing you to precisely position the camera.
Lastly in the bottom corner of the screen there will be a frame that previews what the models thumbnail will look like.